Can Security Cameras See Through Glass at Night? Fix Glare and Missed Motion
Putting a security camera on a windowsill seems like an easy alternative to drilling an outside wall. The camera stays indoors, power is close by and the daytime picture looks perfectly acceptable. Then darkness arrives and the view becomes a white cloud, a reflection of your living room or an empty event history despite someone walking outside.
A camera can sometimes provide useful footage through a window at night, but only when the lighting, reflections and detection method suit the arrangement. An outdoor camera mounted outside the glass avoids several of these problems. Where outside mounting is not possible, you need to test the complete setup rather than assume a clear live picture means reliable security coverage.
Three separate questions: picture, detection and recording
First ask whether the camera can form a usable image of the outside scene. Next ask whether its motion system notices someone crossing that scene. Finally check whether a useful clip is saved and can be retrieved. These are separate functions, and glass can affect them differently.
For example, an image can look clear while a battery camera’s PIR wake-up sensor fails to detect outdoor movement. Another camera might record continuously but send false motion alerts when someone switches on a lamp inside. Troubleshooting works better when you identify which function failed instead of changing every setting together.
| What you see | Likely concern | Useful first test |
|---|---|---|
| White haze appears when night mode starts | The camera’s illumination reflects from nearby glass | Compare with onboard illumination disabled, where supported |
| The room appears over the outside view | Visible indoor light reflecting in the window | Compare with indoor lights off |
| Live picture is clear but movement is missed | Detection technology or event configuration | Check the event log during a controlled outdoor walk |
| Outside becomes very dark with infrared off | Insufficient light reaching the subject | Test suitable exterior lighting |
| Bright objects appear doubled | Reflections involving multiple glass surfaces | Compare another permitted angle or window |
| Image improves when a screen is removed | The screen obstructs or reflects light | Use a clear opening without compromising safety |
Why infrared night vision can fail behind a window
Many ordinary security cameras illuminate the scene using infrared LEDs close to the lens. Outside, that light travels toward the subject and the camera captures the returning light. Behind a window, some of it can reflect from glass only a short distance away. The bright nearby reflection can overwhelm the much weaker outdoor detail.
This is not the same as saying that glass blocks every kind of infrared light. A conventional night-vision camera using reflected illumination and a passive infrared detector responding to thermal changes are different systems. Confusing the two leads to bad advice such as assuming that a visible outdoor picture proves the motion sensor will work.
TP-Link’s camera-placement guidance specifically warns about reflected infrared when a camera faces a window. The practical fix is to change the illumination or the placement, not merely increase recording resolution. More pixels can give you a more detailed picture of the reflection without making the outside scene clearer.
Start with a controlled nighttime comparison
Keep the camera in a stable position and save its current settings before experimenting. Choose a safe test area on your own property, ask someone to walk through the route that matters and note the time. Do not evaluate the setup using only a parked car or a still fence.
- Save a short nighttime recording with the current configuration.
- Switch off the relevant indoor room lights and repeat the same walk.
- If the model supports it, disable its onboard infrared or spotlight and repeat.
- Test with appropriate exterior lighting, leaving other settings unchanged.
- Inspect saved clips and event history separately from the live preview.
- Restore any setting that made the result worse and record the combination that helped.
This sequence tells you whether the dominant problem is indoor reflection, the camera’s own illumination or simply a lack of outside light. It also exposes a setup that looks good in live view but does not detect or retain the test event.
Turn off the illuminator, not blindly every night setting
Apps use night vision to describe several related functions. It may control infrared LEDs, a day/night image mode, an infrared-cut filter or a collection of automatic settings. On some models these controls are independent; on others they are not. Follow the instructions for the exact device and firmware.
Forcing daytime color mode can be a useful comparison when it stops an unwanted illuminator, but it may also reduce sensitivity in dim conditions. Do not assume that black-and-white video is the cause of glare. The problem may be the light reflecting from the glass, and a camera that can keep an appropriate night mode while disabling its own emitters may behave differently.
Wyze’s night-vision troubleshooting page is one example of model-oriented support. Check which controls your model actually exposes before copying a setting from a video about another camera.
Reduce reflections from inside the room
A bright room behind the camera can appear in the window even with the infrared LEDs off. Lamps, televisions, a white wall or the camera’s own indicator lights may contribute. Close a curtain behind the camera where doing so is safe and practical, or change the indoor lighting arrangement, then compare the saved picture.
Placing the lens close to the glass can reduce the area through which room light reaches the lens, especially with a compatible light-blocking mount. It is not a universal cure. Follow the mounting guidance, avoid pressure that damages the window or lens, and keep the device’s required ventilation clear.
Do not wrap a powered camera in insulating fabric or tape over vents to create a homemade shroud. An approved mount that controls reflections is different from trapping heat around the electronics. Likewise, do not cover sensors or components unless the manufacturer specifically permits it.
A dedicated window camera can be a better fit
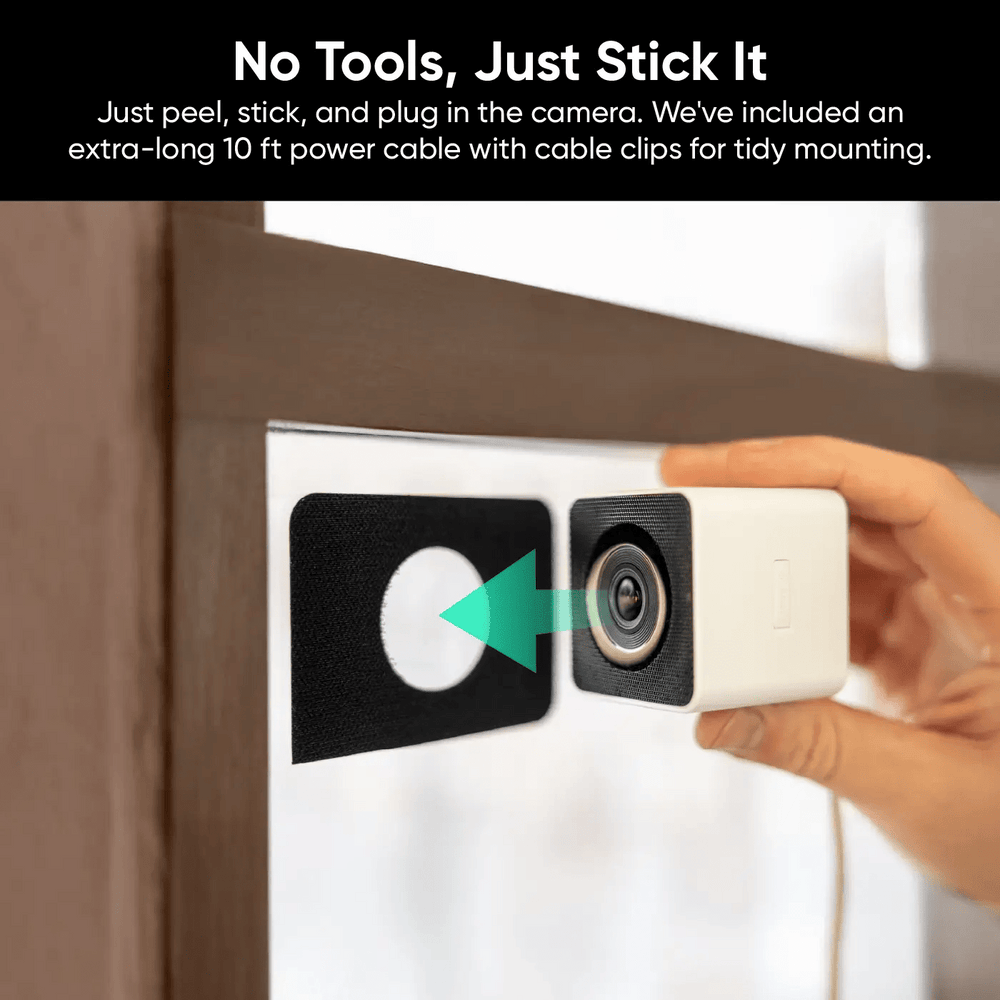
A product designed specifically for viewing through glass may remove compromises found in an ordinary outdoor camera placed on a sill. Wyze’s Window Cam comparison documents an integrated adhesive arrangement without onboard infrared lights or a spotlight. That is different from buying a separate window-mount accessory for another Wyze model.
Removing a troublesome light source does not create illumination outside. Assess the actual scene after dark, especially where the garden is unlit. Also compare local recording, ongoing service costs and mounting restrictions before buying. A purpose-built camera is worth considering when inside-window installation is a genuine requirement, not as a promise that any window will produce good footage.
PIR sensing and video detection behave differently through glass
A PIR detector responds to changes in thermal radiation rather than simply comparing the visible picture. Ordinary residential glazing can interfere with that sensing method. A battery camera may therefore show an attractive outdoor live image after you open the app but fail to wake reliably for someone walking outside.
Video-based detection analyzes image changes and may work through a clear window under suitable conditions. It can also mistake moving reflections inside the room for outdoor activity. Arlo’s glass and motion-detection guidance warns that neither approach should be assumed reliable through windows and distinguishes the technologies used by its products.
A continuous local recording setup can avoid relying on a motion trigger to save footage, where the device supports it. That does not automatically fix alerts or image quality. Test each function independently and use our missed-motion guide if the event log remains empty.
Exterior lighting: illuminate the subject, not the window
Once the camera’s own infrared is disabled, the scene needs another usable source of light. Existing porch or driveway lighting may be sufficient at close range, but a dark garden may remain unsuitable. Test with the lighting that will actually remain available each night, not a temporary torch pointed at the visitor.
A light shining directly toward the window can produce flare and make the situation worse. Aim compatible outdoor lighting at the area you need to see, respecting neighboring windows and safe electrical installation. Motion-activated lights may help with visible detail but can introduce a delay before the camera has enough light for the beginning of an event.
An external infrared illuminator is not an automatic solution either. It must be appropriate for the camera’s sensitivity, safely installed outside and aimed without creating another reflection. A visible-light arrangement may be easier to evaluate, while exterior camera placement often remains the more dependable choice.
Double glazing, coatings, dirt and insect screens
A window is part of the optical path. Dirt, water spots, condensation and surface damage can degrade the view even when the camera lens is clean. Clean accessible glass using appropriate materials, then test again before making large changes to the camera settings.
Double glazing introduces additional reflective surfaces. Coatings and tint can also change how much useful light reaches the camera. Their effects vary, so avoid claims that all modern windows behave identically. Comparing another permitted window or angle is a more useful diagnostic than assuming the camera is defective.
An insect screen may be barely noticeable to your eyes while becoming an obvious pattern or source of scattered light in the video. Wyze’s Window Cam product guidance recommends an unobstructed view without a screen. Do not remove required safety features or create a fall risk to improve footage; choose a different location when necessary.
How close should the lens be to the glass?
There is no universal distance suitable for every lens, mount and window. The useful aim is to minimize unwanted room reflections while maintaining a stable installation, acceptable focus and adequate ventilation. A compatible flush mount is different from pushing the lens against the pane by hand.
Check the scene at the distances that matter. A close object on the sill may be out of focus even when the gate is sharp, which is not necessarily a fault. Avoid placing cables where opening the window can pinch them or where children can reach dangling cords. The setup must remain safe during normal window use.
A sharply angled view along the glass may make reflections and obstructions harder to control. Try a more direct permitted view before buying filters or extra lights. Use saved footage to judge whether the changed angle still covers the approach you care about.
Be cautious about filters and software fixes
A polarizing filter can reduce certain reflections in a compatible optical setup, but it is not a guaranteed night-vision fix. Filters also affect the light reaching the lens, so a darker scene may be the result. Do not attach an unsupported accessory over emitters or sensors and assume it improves security coverage.
Higher sharpness cannot recover detail obscured by a bright reflection. Higher sensitivity may produce more false alerts from the room without improving the view outside. Changing resolution can affect storage and bandwidth while leaving the underlying lighting problem untouched.
If a proposed fix seems to improve a static preview, repeat the walking test. A person in motion is a better check than a perfectly still garden ornament because the camera may compensate for poor light using an exposure that blurs movement.
When mounting outside is the better answer
Outside mounting removes the window from the optical path and lets you choose a position for the approach rather than for the available sill. It can also give the camera’s intended detection technology a clearer view. Those advantages are significant when the inside arrangement repeatedly fails nighttime or motion tests.
The tradeoff is doing the installation properly: choose a weather-rated device, approved mounting and protected power connections. Do not assume an outdoor camera housing makes its power adapter suitable for rain. Our camera placement guide covers the positioning decision, and the budget outdoor camera guide compares relevant power and storage options.
Where a landlord or building policy prevents exterior installation, an indoor window camera can still be useful for limited observation. Be clear about the limitations you measured rather than describing it as equivalent coverage.
Privacy still applies when the camera is indoors
Putting the equipment behind your own window does not resolve questions about what it records outside. Aim at the entrance or property area that serves a real purpose, avoid unnecessary views into neighboring private spaces and review audio settings. Check the applicable rules for your location and building.
Protect the account, use supported firmware and manage shared access. Someone who can view the feed may learn the household’s routine even when the camera never points indoors. Our camera privacy guide explains the practical questions to ask.
Your final acceptance test
After choosing the best settings and location, leave the system operating through normal daytime and nighttime conditions. Check what happens when the room lights come on, when exterior lighting switches and when rain or condensation affects the window. Review the original saved video, not only the compressed app preview.
Confirm that the system detects the intended movement, saves enough context and lets you export the result. If any of those functions remains unreliable, narrow the job you expect the camera to perform or change the installation. A working live view is useful, but it is not proof of dependable monitoring.
Frequently asked questions
Can an infrared camera see through a window?
A conventional night-vision camera may capture outside detail through glass under suitable lighting, but its built-in infrared can reflect back into the lens. This is different from thermal imaging or PIR detection, so the word infrared alone does not answer the question.
Will turning off infrared solve the problem?
It can remove one major source of glare, but the outside scene still needs enough usable light. Indoor reflections, screens and motion-detection limitations can remain.
Why does the live picture work but motion detection does not?
The image sensor and motion-trigger system may use different technologies. A visible scene does not establish that a PIR sensor can reliably detect a person through the glass.
Is a dedicated window camera worth buying?
It can be a better fit when inside-window installation is necessary and the product’s mounting and light controls address your actual problem. Test its performance on your window and under your exterior lighting rather than expecting a universal result.
Should I replace a blurry camera immediately?
Not before comparing room lights, onboard illumination, glass condition and the saved recording. For blur that also occurs with an outside-mounted camera, use our nighttime blur troubleshooting guide.