How to Bolt Down a Home Safe: Approved Anchors, Floor Checks and Installation Limits
.sl-safe table{border-collapse:collapse;width:100%;margin:24px 0}.sl-safe th,.sl-safe td{border:1px solid #bccbd0;padding:12px;text-align:left;vertical-align:top}.sl-safe th{background:#edf3f1}.sl-safe .table-scroll{overflow-x:auto}.sl-safe figure{max-width:720px;margin:28px auto}.sl-safe img{display:block;max-width:100%;height:auto;margin:auto}.sl-safe figcaption{font-size:14px;line-height:1.6;color:#405b62;padding-top:10px}.sl-safe .note{padding:20px;border-left:4px solid #27685d;background:#f0f6f3;margin:24px 0}
A safe can have substantial construction and still be installed badly. The wrong anchor, a fixing that reaches only a floor finish, or an unapproved hole through the cabinet can undermine the protection you paid for. The objective is not simply to make the box feel difficult to move by hand.
Bolt down a safe only through its approved fixing points, using a method suitable for both the model and the actual structure. Establish concealed services and any structural restrictions before drilling. There is no universal bolt diameter, hole depth or torque setting that safely fits every safe and every floor.
Before you buy anchors, find the exact manual
Identify the safe by model and revision where relevant, then obtain its installation instructions from the manufacturer. Do not use the instructions for a similar-looking cabinet. Determine whether base fixing, rear fixing or another arrangement is expressly supported.
Read the protection and warranty notes as well as the diagram. Some models use specific sealed fixing components, while others have different conditions after anchoring. A supplied packet of bolts is not proof that they suit every substrate in which the safe might be installed.
Use the safe-ratings guide to understand which claims you are trying to preserve. A successful fastening job should not quietly change the fire or water protection without the owner understanding it.
Check whether the installation is a reasonable DIY task
A small model with clear manufacturer instructions and an understood suitable substrate can be different from a heavy cabinet, unknown slab or rated commercial installation. The decision depends on the work, your competence and the building, not merely on whether you own a drill.
Use professional help for difficult handling, uncertain structure, concealed services or a specification required by an insurer. An installation certificate or documented professional fitting may be part of the requirement. Ask before buying rather than assuming a photograph of bolts will satisfy it.
| Question | Proceed only when |
|---|---|
| Does the model support the intended fixing? | The manufacturer’s instructions identify it |
| Is the supporting material known? | The floor or wall has been assessed beyond its decorative finish |
| Are concealed hazards resolved? | Services and structural restrictions have been checked appropriately |
| Can the safe be handled safely? | Suitable equipment, route and competent assistance are available |
| Are approvals needed? | The owner, insurer or responsible building party has agreed the relevant work |
An unresolved answer is a reason to stop at planning. It is not something to discover after the first hole has been drilled.
Distinguish the floor finish from the structure
Carpet, tiles, laminate and screed can conceal the material that actually needs to carry the fixing. The anchor must be suitable for the real substrate and the specified installation. Gripping only a thin finish does not establish meaningful structural restraint.
Concrete, masonry, timber joists and hollow constructions can require different designs. Even within one material, condition, thickness, edge distances and the selected anchor’s requirements matter. A generic masonry fixing should not be treated as approved for every floor described as concrete.
Do not solve the uncertainty by simply choosing the longest available bolt. That can reach a concealed hazard without providing the intended support. Have the installer explain what the fastening engages and why the method is appropriate.
Drilling into an unknown slab can damage structural tendons, reinforcement, heating, plumbing or electrical services. A floor that looks ordinary from above may have requirements that are invisible at the surface.
The Post-Tensioning Institute’s repair and alteration guidance addresses work on post-tensioned structures. Do not treat a domestic scanning tool or a guessed drawing as a complete structural clearance where competent assessment is needed.
For a rented or managed building, ask the responsible party for the relevant information and permissions. A refusal to drill in one area should lead to an approved alternative location or design, not a hidden attempt to work around the restriction.
Use the model’s actual fixing kit where specified
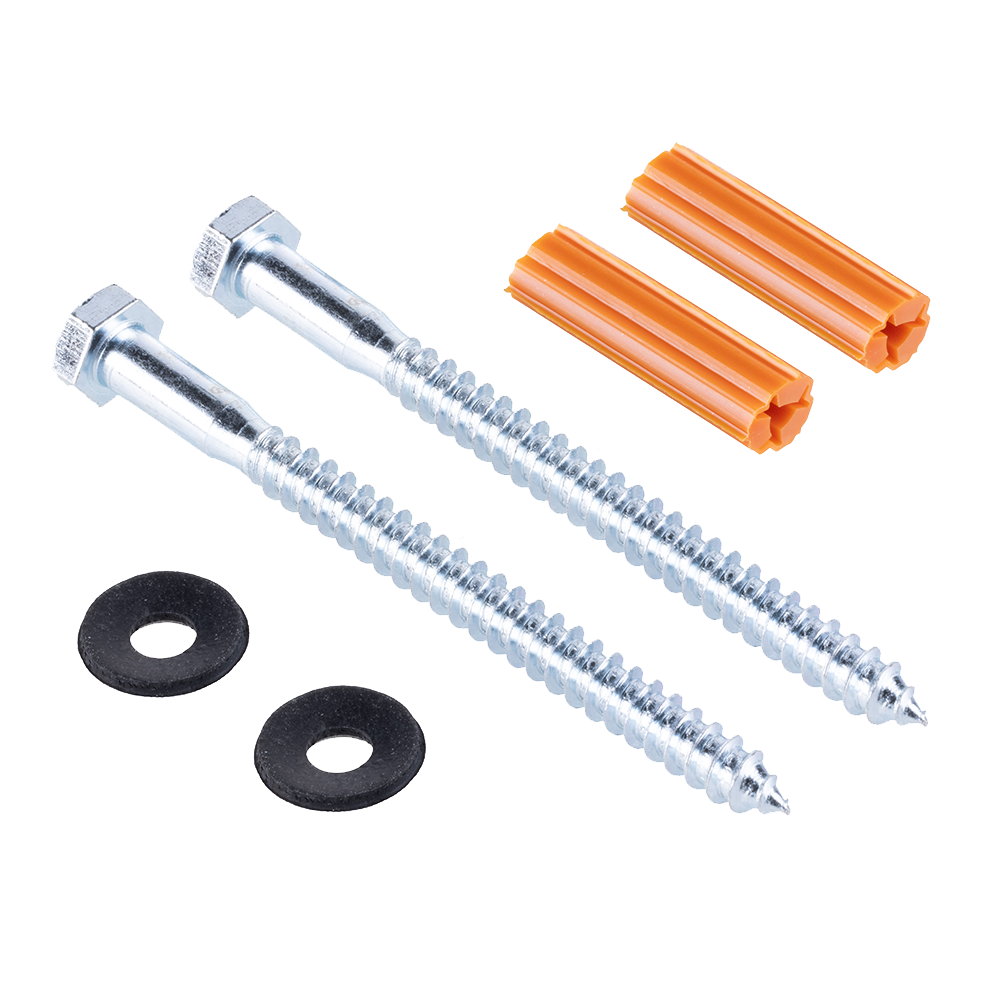
SentrySafe identifies P72294 for base models FP082 and FPW082, with a water-protection role for the specified installation. That is a useful example of why a kit needs to match the safe, not just fit through a hole.
Do not transfer that compatibility to an older SFW model or a different manufacturer. Confirm the current manual and supplied product. A seller calling a package a safe bolt-down kit does not establish approval for your particular cabinet.
Will bolting down change fire or water protection?
It can, depending on the design and installation. Manufacturer guidance may distinguish preserving a fire claim from preserving a water claim. Some products use designated sealed fixings; others have a stated tradeoff when the base is opened for anchoring.
SentrySafe’s support FAQ discusses this distinction, while the newer model-specific kit above shows why a blanket statement about the whole brand would be misleading. Ask which instructions apply to the exact safe and obtain the answer before altering it.
Never create an additional fixing hole in the side, rear or base simply because the existing points are inconvenient. Changing the shell or its insulation is not equivalent to using a factory-approved mounting provision.
A safe installation sequence
First, approve the location. Confirm structure, services, permissions, door clearance and the handling route. Use the location guide to compare realistic options before positioning a heavy unit.
Next, match the hardware and preparation. The exact safe instructions and anchor documentation govern hole size, depth, cleaning, installation and tightening. Keep those values tied to the actual product rather than a universal internet checklist.
Then, have the fastening installed and checked. Use safe handling and suitable tools, protect the contents and keep debris away from the mechanism. The finished cabinet should sit correctly and operate normally; it should not be pulled out of shape by overtightened fittings.
This sequence deliberately does not substitute invented drilling dimensions for your manual. The useful work is confirming that the correct instructions can be followed in the real building.
Timber floors and lightweight walls
Do not assume that a board beneath the safe provides the same support as a structural timber member. The position and suitability of the actual framing need to be understood. A fastening method appropriate to concrete cannot simply be transferred to timber by changing the screw head.
Likewise, plasterboard or lightweight lining is not interchangeable with sound masonry. A rear fixing must be permitted for the safe and supported appropriately behind the finish. A convenient wall location may still be unsuitable for the intended anchoring.
Ask an installer or structural professional to specify the appropriate method where necessary. If an insurer has requirements, get its acceptance of the proposed arrangement rather than relying on a retailer’s general comment about wooden floors.
Carpet, skirting and uneven surfaces
A finish can prevent the safe from sitting flush or alter how an anchor engages. The installer should resolve that condition in accordance with the safe and fastening instructions, not use the bolts to bend the cabinet into position.
Do not insert improvised compressible packing or a decorative board beneath a heavy safe without checking its role in the installation. A moisture barrier or approved plinth may be appropriate for some products, but it must preserve support and anchoring.
Make necessary preparation part of the quote. Removing and making good a small area of finish can be very different from assuming the installer will drill through everything untouched.
Why glue or furniture attachments are not automatic substitutes
Adhesives and attachments to furniture can be marketed as no-drill alternatives, but their suitability depends on the safe, material and tested arrangement. Do not describe a general construction adhesive as equivalent to the manufacturer’s approved structural fixing.
A cabinet secured to a lightweight wardrobe can remain dependent on the wardrobe’s own strength and attachment. That may not meet the intended burglary or insurance requirement. The relevant question is the performance of the whole installed assembly.
For a no-drill tenancy, discuss a permitted solution with the responsible owner and supplier. A different storage arrangement can be more honest than claiming a temporary restraint preserves a certification it was never designed to support.
Safe handling is part of the job
Empty the safe as instructed and protect sensitive contents during installation. A heavy door changes the handling balance, so do not tilt, lift or remove components without the manufacturer’s guidance and appropriate equipment.
Delivery crews may need specialist handling for stairs, thresholds and tight turns. Plan that service rather than improvising with household furniture or equipment of unknown capacity. The route has to support the safe, handling tools and people involved.
A safe should never be left in a position where opening its door could make it unstable. Keep users away from an unfinished heavy installation until the installer has completed the required support and fastening checks.
Check operation after anchoring
With authorized access available, test the normal closing and locking sequence. The door should not scrape, require a special shove or leave the handle under abnormal pressure. Shelves and trays should still fit correctly.
Check that required seals and protective components remain as specified. Do not treat visible bolt heads as the whole acceptance test. Ask the installer to explain any adjustment and provide maintenance instructions.
| Record | Why it is useful |
|---|---|
| Safe model and approved fixing method | Identifies the installation instructions used |
| Substrate and relevant assessment | Shows what the anchors actually engage |
| Anchor or kit identity | Supports future servicing and inspection |
| Any protection-related condition | Clarifies fire, water or policy implications |
| Installer and date | Provides an accountable route for follow-up |
| Normal-operation check | Confirms the safe remains usable after fitting |
Store the record securely without publishing the exact location, serial number or access credentials. Keep an accessible copy outside the safe so you can contact the installer during a lockout.
Moving or modifying the installation later
Reassess the structure and required fitting when the safe moves. Reusing old anchors or copying the original method onto a different floor is not automatically appropriate. Check whether fixing components are reusable under their instructions.
A new room can also change moisture, clearance and handling. Use the installation-type comparison when considering a more substantial change rather than treating a recessed or elevated arrangement as a simple relocation.
Do not enlarge a hole, replace a lock or modify the shell without checking the safe manufacturer’s requirements. The product’s protection depends on more than the fact that it still closes.
Frequently asked questions
Does every safe need bolting down?
Follow the exact product, certification and policy requirements. Weight alone is not a reliable exemption, and some containers have different intended uses or approved mounting methods.
Can I bolt a safe to a wooden floor?
Possibly with an appropriate structural and product-specific design. Floorboards alone should not be assumed equivalent to suitable structural support or an accepted insurance installation.
Will any strong masonry bolt work?
No. Anchor selection depends on the substrate, geometry, loading and the safe’s instructions. A familiar brand or large diameter is not a complete specification.
What should I do when I cannot drill?
Resolve the restriction with the owner, installer and relevant insurer. Choose an approved alternative rather than claiming an improvised attachment provides the same protection.