Door Sensor Says Open When the Door Is Closed? Diagnose Alignment, Batteries and Signal
The door is visibly shut, yet the alarm refuses to arm or the app insists the entrance is open. The tempting shortcut is to bypass the sensor and leave. That removes the warning without establishing whether the entrance is still being monitored.
First confirm the exact sensor and error, then check the relationship between the contact and its magnet. If the reading is stale or the device is offline, investigate power and communication separately. A closed door, a locked door and a sensor reporting closed are three different facts. This guide helps restore a trustworthy reading rather than merely silence the display.
Start with the right device and the right message
Read the full error and sensor name. Open and close the intended entrance during a permitted test and see whether the named device changes state. Incorrect labels are common after a move, sensor replacement or room rearrangement.
Do not assume open means the same as offline, not responding or tampered. A system can retain an old status after losing communication, while a loose cover may generate a separate warning even when magnetic alignment is correct. Follow the model’s actual terminology.
| Message or behavior | First area to inspect | A poor first response |
|---|---|---|
| Open consistently, device otherwise responds | Gap, orientation, mounting and actual closure | Factory-resetting the entire alarm |
| Status changes only when door is pushed hard | Door fit or unstable sensor placement | Calling the occasional closed reading a repair |
| Offline or not responding | Battery and device-to-hub communication | Only changing the magnet position |
| Tamper warning | Approved enclosure, bracket and cover checks | Taping down a switch or disabling the warning |
| Keypad updates but app does not | Hub, account and app communication | Replacing a sensor that reports correctly locally |
| Several devices fail together | A shared hub, power or configuration problem | Buying several replacement contacts immediately |
Save the message and approximate time before changing settings. A short record of what the system actually reports is more useful than repeatedly restarting everything until one warning disappears.
Arrange a safe test
If professional monitoring is active, use the provider’s approved test procedure and tell relevant occupants what you are doing. Do not deliberately trigger a dispatch to see whether the sensor works. Confirm that ordinary monitoring is restored when the test is complete.
Keep the entrance usable and avoid creating a lockout. For a rented or managed property, get permission before moving hardware or drilling. This article covers ordinary authorized maintenance, not bypassing somebody else’s security system.
If a sensor is temporarily excluded during repair, record the reduced coverage and arrange a prompt fix. Do not forget the exclusion because the system now arms without complaining.
Check that the door actually reaches its closed position
A latch may catch while the door remains slightly proud of the frame, or a window can rest in a ventilation position. Inspect the normal fit, seals and visible obstructions. Watch whether the entrance rebounds after being released.
If a firm push temporarily corrects the sensor reading, the problem may involve door alignment rather than a defective sensor. Repair the door instead of mounting the sensor to report closed while the opening is not properly seated.
Our door-alignment guide explains the mechanical checks. A sensor is a reporting device; it does not strengthen a latch or certify that a bolt has fully engaged.
Measure the sensor-to-magnet relationship
A typical contact uses a sensor and a separate magnet installed on opposite parts of the opening. The manufacturer specifies the permitted alignment and separation. Check the markings, orientation and surfaces rather than measuring only the distance between any two convenient corners.
For the SimpliSafe Entry Sensor covered by its false-open guide, the stated maximum separation is 1.5 inches. The same guide identifies metal mounting and distance from the base station as possible contributors. That number is specific to the documented device, not a universal contact-sensor clearance.
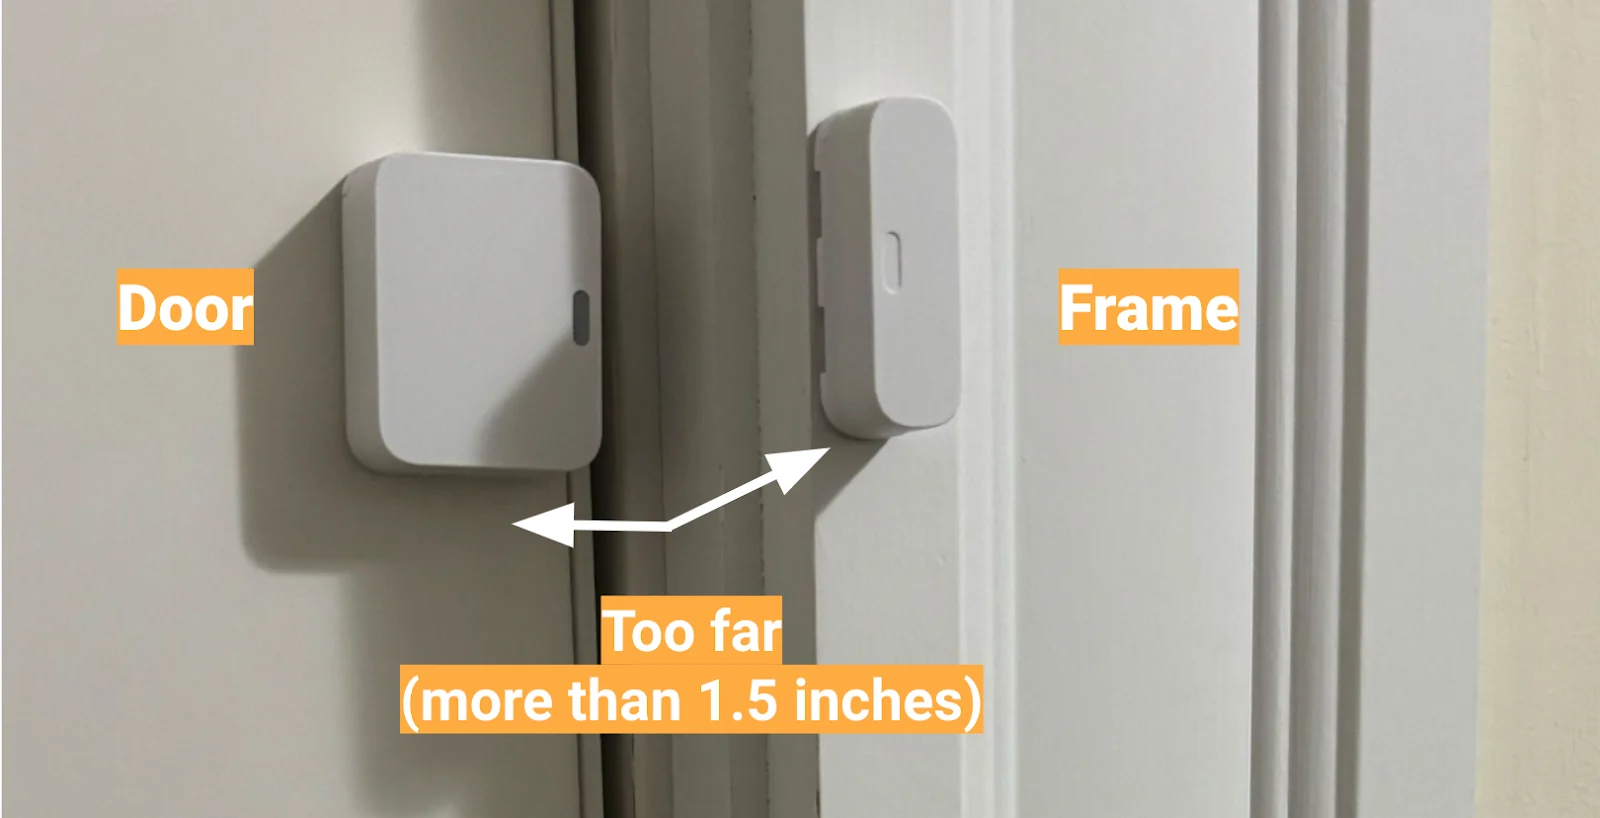
Do not deliberately install at the edge of a published maximum when the door moves during normal use. Seek a stable permitted arrangement with appropriate tolerance, while maintaining access to the battery compartment and avoiding interference with closure.
Raised trim and uneven surfaces
Decorative molding can put the magnet on a different plane from the sensor. A small measured horizontal gap may therefore conceal an unsuitable three-dimensional alignment. Follow the manufacturer’s examples for the relevant door or window shape.
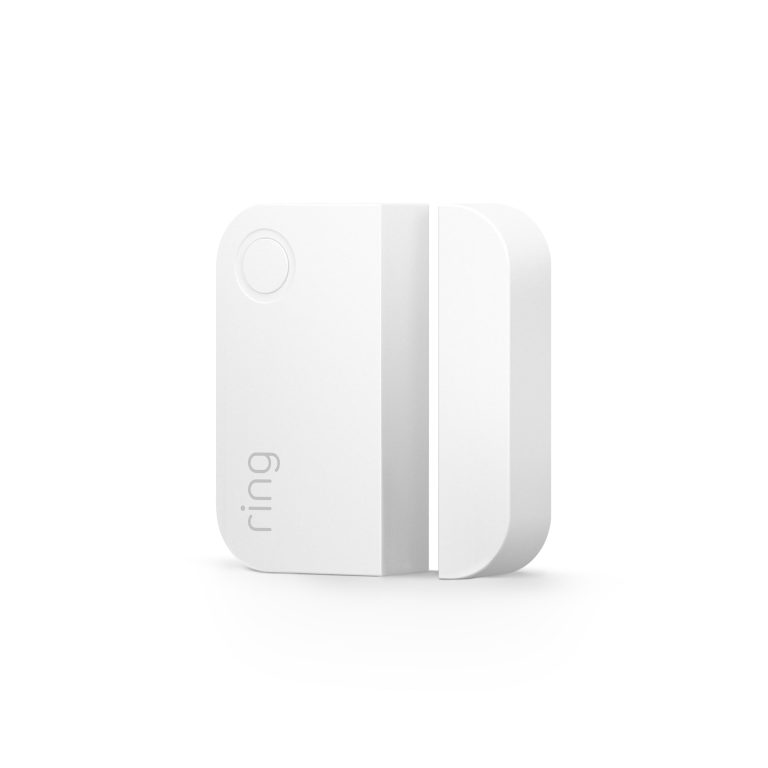
Ring’s trim and door-positioning guidance explains alternative arrangements for its contact sensors. For its second-generation product, the documented gap is no more than one inch or 2.5 cm. Do not transfer that limit to a different brand or generation.
Use approved spacers, mounting parts and surface preparation where required. A pile of unstable adhesive layers may appear to solve alignment today but move with heat or ordinary door use.
Inspect the adhesive and bracket
Check whether either part has shifted, rotated or lifted away from its surface. Dust, poor preparation, unsuitable paint or repeated impacts can affect mounting. Mark the original position in your private notes before removing anything so you can compare the change.
Use replacement adhesive or fasteners permitted by the manufacturer and property owner. Avoid drilling near concealed wiring, glazing or internal lock components. A rated door may have restrictions that a general sensor instruction does not override.
After remounting, let the attachment settle as instructed and test normal closure repeatedly. A correction that works only while you hold the sensor in place is not a finished installation.
Metal frames can create a different problem
Metal can affect the magnetic relationship or radio communication depending on the design. Some sensors are intended for particular metal installations; others require approved spacing or a different position. The right response comes from the exact product documentation.
Abode’s Mini Door/Window Sensor guidance warns about nearby metal and includes a pre-mounting test. Its original, mini, recessed and outdoor products should not be treated as identical simply because they report the same open-or-closed event.
Where the existing setup is unsuitable, ask support about a compatible spacer, mount or alternative model. Do not add a stronger loose magnet to force a reassuring reading while leaving the real opening unmonitored.
Separate a battery warning from magnetic alignment
If the sensor is offline or fails to report any changes, check its documented battery requirement and replacement process. Different models can use different cells, and physical fit is not enough to establish the correct chemistry or voltage.
SimpliSafe’s Not Responding guide describes battery and range checks and notes that the app warning may not clear instantly after replacement. Use the guidance for the relevant system generation instead of repeating changes before the expected status update.
Keep small batteries away from children and dispose of used cells appropriately. If the device has leakage, corrosion, a damaged compartment or unusual heat, stop routine troubleshooting and obtain suitable support.
Test the sensor-to-hub link
An entry sensor may communicate with a dedicated base station rather than directly through household Wi-Fi. Restarting the internet router is therefore not a universal cure for a sensor that cannot report locally. Identify the actual communication path.
Use the manufacturer’s signal or test procedure at the installed position. Compare one problem contact with other devices and consider recent changes: a moved hub, metal furniture or renovations can alter the arrangement. A short controlled test nearer the hub may help isolate coverage where the official procedure calls for it.
Do not relocate the hub permanently until you check every other relevant sensor. Improving one distant entrance while losing another creates a trade rather than a complete repair.
When the app and local system disagree
If the keypad or hub updates accurately but the phone does not, inspect app login, connectivity and refresh behavior. Check whether another authorized device sees the current status. That helps distinguish a local sensing problem from a stale account view.
Preserve the sensor enrollment while investigating the app path. Deleting and re-adding a working device can create duplicate names or remove configuration without addressing the actual connection issue.
Our monitoring guide explains why local operation and remote reporting need separate tests. A correct local chime does not guarantee a phone notification, and a quiet phone does not prove the contact failed.
Tamper warnings and damaged covers
Follow the exact product’s instructions for checking the enclosure and its attachment. A cover left incompletely seated after battery replacement can produce a warning distinct from open. The display should identify which condition exists.
Do not tape or glue a tamper mechanism into a permanent state. That conceals information the device was designed to report and can make future maintenance harder. Replace broken covers or brackets with suitable parts where available.
If a warning began immediately after servicing, tell support what changed. That timing can be more useful than assuming the radio or magnet failed at the same moment.
Double doors, sliders and unusual windows
Make sure the sensor arrangement reports the opening you intend to monitor. On double doors, the active and inactive leaves can move separately. On a sliding window, a sensor positioned for one panel may not report another opening route.
Use the manufacturer’s supported examples and test each legitimate opening mode. A sensor showing closed for one panel does not establish that every leaf is secured. Our French-door guide and sliding-door guide address the underlying mechanical assembly.
Do not alter required escape or ventilation functions to accommodate a convenient sensor location. Choose appropriate hardware rather than obstructing the opening.
Wired contacts require a different escalation path
An old wired zone may combine several contacts, so one open report can refer to a group rather than a single window. Preserve the zone list and have an authorized installer identify the affected circuit and equipment.
Do not join wires, short terminals or bypass a circuit to make the panel accept it as closed. That can hide a fault and reduce protection; life-safety equipment may also share the cabinet. A DIY wireless-sensor article is not an appropriate wiring guide for an unknown system.
For an inherited installation, our alarm takeover guide explains how to inventory and assess reuse without dismantling unfamiliar equipment.
When resetting or replacement makes sense
Use a re-pairing or reset procedure only when the manufacturer recommends it for the diagnosed state and you have legitimate access to restore configuration. Record the device name, location and settings first. A reset does not correct loose adhesive or a distorted door.
Replacement becomes reasonable when a supported test indicates a device fault, damage makes the mounting unreliable or the model is unsuitable for the environment. Confirm the replacement’s generation and hub compatibility before ordering.
A complete alarm replacement is rarely the first justified response to one false-open indication. Narrow the fault and obtain appropriate support before discarding functioning equipment.
The acceptance test
- Confirm the correct opening and sensor name.
- Close the door normally without pushing it into an artificial position.
- Verify the local system shows the intended state.
- Open and close it repeatedly through ordinary travel.
- Check the authorized app and any relevant notification.
- Restore normal arming and monitoring after the approved test.
- Recheck after ordinary use or a temperature change that previously caused trouble.
Keep the result in your maintenance notes. A useful repair produces reliable state changes in both directions; it does not merely hold the device permanently at closed.
What to send support
Provide the sensor and hub model, exact error, battery-change history and photographs of the closed-door alignment. Include whether the keypad and app agree and whether other sensors work. Keep credentials and your complete security layout out of public posts.
Those details allow support to distinguish a spacing issue, signal problem and hardware fault. They are more useful than saying that the alarm has become unreliable without showing which part of the reporting chain fails.
Frequently asked questions
Does a closed contact mean the door is locked?
No. It reports its designed relationship to the magnet, not necessarily the bolt’s engagement. Inspect and operate the primary lock separately.
Can I use one spacing measurement for every brand?
No. Maximum separation and alignment are model-specific. Check the actual instructions and allow for normal movement.
Should I leave the sensor bypassed?
Do not treat bypass as a repair. Where a temporary exclusion is appropriate and authorized, record the reduced coverage and arrange correction promptly.
Why does it work when I press the door inward?
The door fit or sensor position may be marginal. Fix the normal resting arrangement rather than relying on extra pressure each time.